When to Call a Pro: Grooming an Anxious Dog
Jan 18, 2026 • 8 min
The clippers buzz, your dog stiffens, and what was supposed to be a quick trim turns into a wrestling match. You think, "I can handle this," until a nip or meltdown proves otherwise.
This post helps you decide: when is home grooming still okay, and when should you hand the leash to a trauma-informed pro? I’ll walk through clear behavioral and medical red flags, exactly what to do before the first appointment, the questions that separate real fear-free groomers from the crowd, and a printable-style checklist you can use when booking.
Spoiler: calling a pro isn’t failure. It’s responsibility.
Why this matters (short version)
Grooming isn’t cosmetic for many dogs — it’s physical care that can expose skin problems, painful mats, or infections. For anxious dogs, the wrong approach can create a lifelong phobia. The goal is safety and emotional welfare, not finishing a to-do.
Quick way to size up your dog
You don’t need a behaviorist badge to tell whether home grooming is fine. Ask yourself:
- Does your dog tolerate handling of paws, ears, and muzzle without freezing or trying to flee?
- Do they calm after a short session, or do they escalate (growl, snap, bite, hide) each time?
- Are there medical signs (red ears, skin sores, obvious pain) that make touch sensitive?
If you answered "no" to the first and "yes" to the second or third, stop DIY and call a professional who understands fearful dogs.
Behavioral red flags — call a professional if you see any of these
You can’t always predict a bite, but these behaviors are reliable red flags:
- Extreme avoidance: hiding, frantic attempts to escape, or “shut down” freezing when grooming tools appear.
- Escalating aggressive signals: growling, snapping, lunging as grooming continues.
- Panic specific to tools: intolerable fear of clippers, dryers, or the nail trimmer that worsens each attempt.
- Repeated shutdowns: dog stops responding, refuses food, or goes limp — that’s severe distress.
- Post-groom regression: more hiding, generalized anxiety, or aggression after a grooming session.
If your dog shows any of the above, professional intervention is necessary — for their safety and yours.
Medical and practical red flags
Sometimes "behavior" is actually pain. These situations need a vet or a vet-recommended groomer first:
- Severe matting. Mats pull skin and can hide infections; they often require shaving with professional tools.
- Skin issues, open wounds, hot spots, or dermatitis.
- Ear infections or discharge (these make head handling painful).
- Overgrown nails where the quick is a concern.
- Pain signs during handling: flinching, vocalizing, or guarding specific areas.
If you’re unsure whether it’s pain or fear, get a vet check. A tender body part explains a lot.
How I learned this the hard way (a real, short story — 150 words)
I once tried to do a sanitary trim on my dog, Miso — an energetic border collie who hates being restrained. He froze, then flinched so hard his foot jerked and I nicked his skin. He yelped and wouldn’t let me touch his rump for a week. I felt awful.
We booked a Fear Free groomer recommended by our vet. On the first visit they did a 15-minute “meet and greet”: treats, table introduction, a towel touch, zero clipping. Two weeks later they trimmed the face and sanitary area in three five-minute segments, high-value treats, and a low-speed dryer. Miso left relaxed. It cost more than my at-home effort, but I saved my hands and his trust. That visit rewired how I think about grooming — sometimes the cheapest option is the one that breaks less.
Micro-moment: what stuck with me
The groomer’s assistant whispered one thing I still use: “If the dog eats the treat, you’re winning.” Small wins matter more than finishing the whole job.
Preparing your dog before the first professional appointment
Start weeks out. The point is to make tools, touch, and the environment predictable and rewarding.
- Introduce tools calmly. Let your dog sniff brushes, treats nearby. Turn clippers on across the room; reward calm behavior.
- Short handling sessions. Gently lift paws, open ears, stroke the muzzle for 30–60 seconds, then stop. End on a treat. Repeat daily.
- Mimic the table. Practice getting onto a sturdy chair for 10–20 seconds, then praise. Gradually increase time.
- Build conditioning around the door and car. If the groomer is a drive away, take short trips with treats so the car doesn’t equal stress.
- Collect medical history. Note past reactions, meds, skin issues, and any vet diagnoses. Share these with the groomer in advance.
- Choose timing carefully. Book when your dog is calm (after a walk, not after play) and avoid back-to-back stressful activities.
If your dog is in pain, start at the vet first.
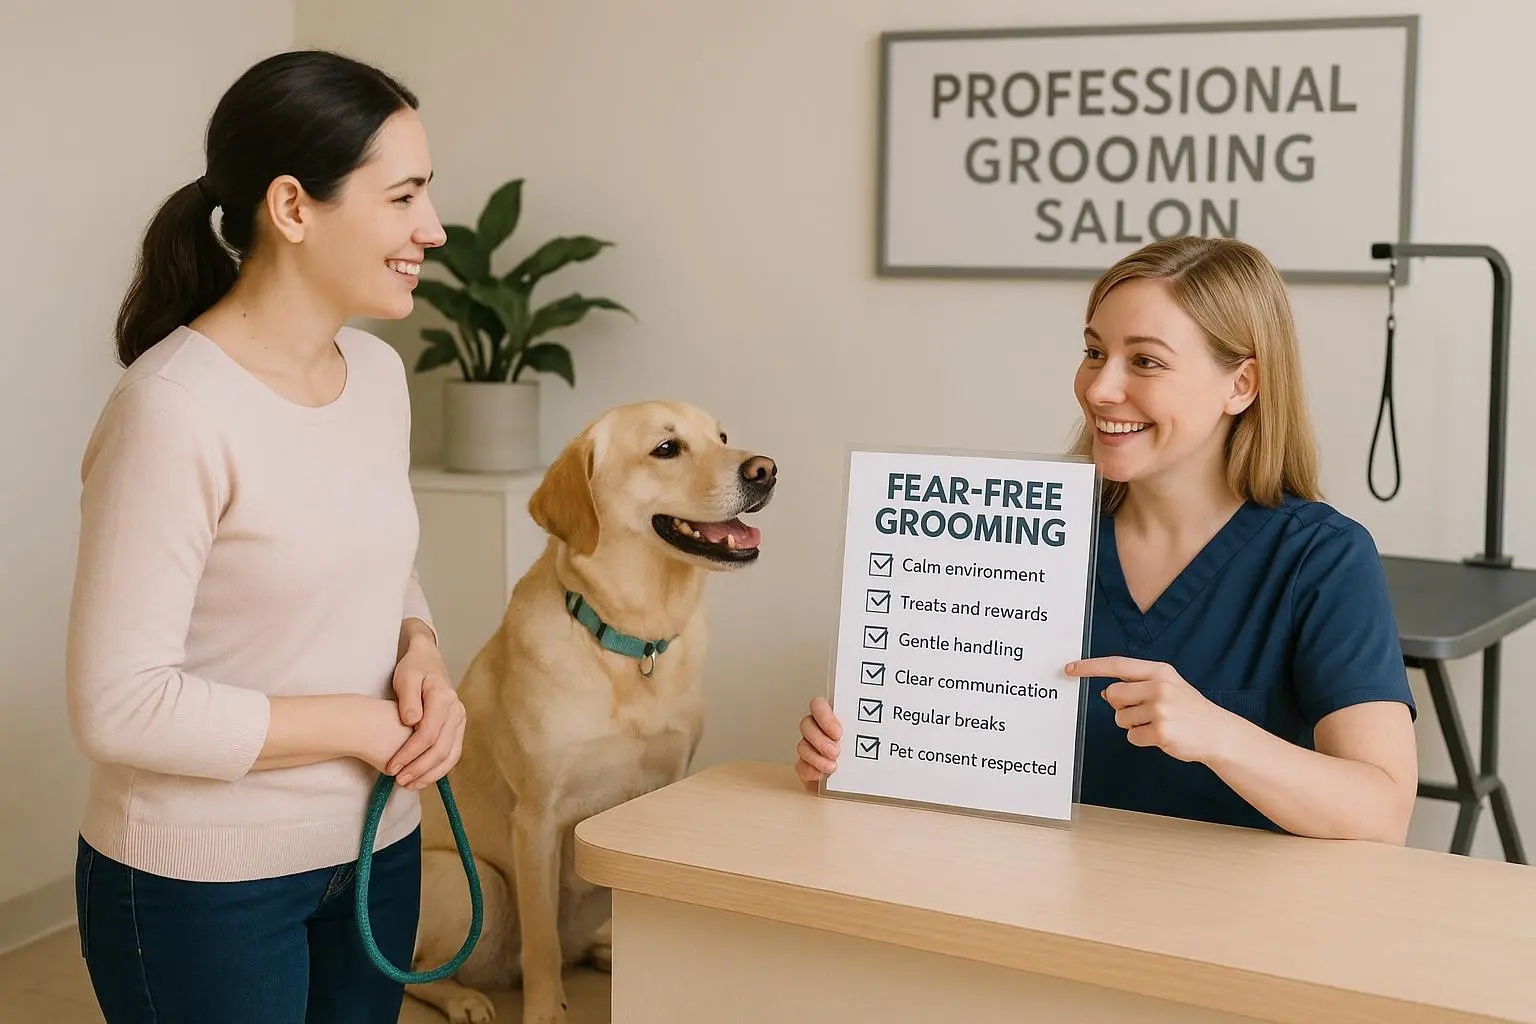
The "meet & greet" — ask for this
A real trauma-informed groomer will offer a short, no-pressure visit. That visit is worth more than a long first grooming because it sets expectations and builds trust. If a groomer refuses a meet & greet, that’s a red flag.
What to ask a groomer — the real, useful questions
Some questions get rehearsed answers. These get straight to handling and mindset.
- Are you Fear Free Certified or trained in low-stress handling? (If yes, ask for specifics.)
- Do you offer assessment or “happy visits” separate from grooming?
- How do you introduce clippers and dryers to an anxious dog?
- What’s your policy if a dog becomes overwhelmed mid-session? (Look for answers about breaks, stopping the groom, and phased work.)
- How long do you schedule for anxious dogs? (Short sessions are better than rushed full grooms.)
- Do you use muzzles? If so, how and when?
- Can I provide my dog’s favorite treats or items, and can I stay for the first visit?
- Have you worked with dogs who snapped or bit before? What did you do?
Red flags in answers: dismissiveness (“they’ll get over it”), unwillingness to stop, no assessments, or “we just finish it fast” mentality.
What a trauma-informed groomer should do during an appointment
- Start with a calm introduction and choice-based interactions (dog chooses approach).
- Use positive reinforcement and frequent breaks.
- Avoid rushing. They may do a tidy-up on the first visit.
- Use low-speed dryers, towel drying, and introduce noise gradually.
- Communicate throughout: tell you what went well and what was hard.
- Be ready to stop work and reschedule rather than force a fearful dog.
A printable-style pre-appointment checklist
Two weeks before:
- Research and call 3 groomers; ask the fear-free questions
- Schedule a meet & greet or assessment
- Start daily 2–3 minute handling practice
- Gather medical notes and photos of coat condition
One week before:
- Confirm meet & greet
- Practice crate or car rides if travel is involved
- Keep routines normal; avoid overstimulation
Day before:
- Keep exercise light and calming
- Pack favorite treats, a familiar towel, and a recent photo
- Write down any new behaviors to tell the groomer
Day of:
- Stay calm — your energy matters
- Arrive on time, share all medical/behavior notes
- Ask about communication during the appointment
- Confirm pickup time and follow-up plan
After the appointment:
- Observe for 24–48 hours for behavior changes
- Ask what worked and what to continue at home
- Schedule the next short session while the experience is fresh
When the DIY route is still okay
If your dog tolerates short sessions, doesn’t escalate with tools, has no medical flags, and you practice low-stress handling, home grooming is fine for maintenance. Keep sessions under 10–15 minutes initially and maintain a calm routine.
Extra tools and resources worth using
- Fear Free directory (find certified pros)
- Trainer apps (short handling lessons)
- PetDesk for reminders and records
- High-value, smelly treats at grooming time (cheese, cooked chicken)
Final note: this is about trust, not speed
Grooming success comes from small, repeatable wins. One five-minute calm clipping is better than a full groom that breaks your dog’s trust. When in doubt, choose safety — for their body and their mind.
References
Ready to Optimize Your Dating Profile?
Get the complete step-by-step guide with proven strategies, photo selection tips, and real examples that work.